Homemade Chili Crisp
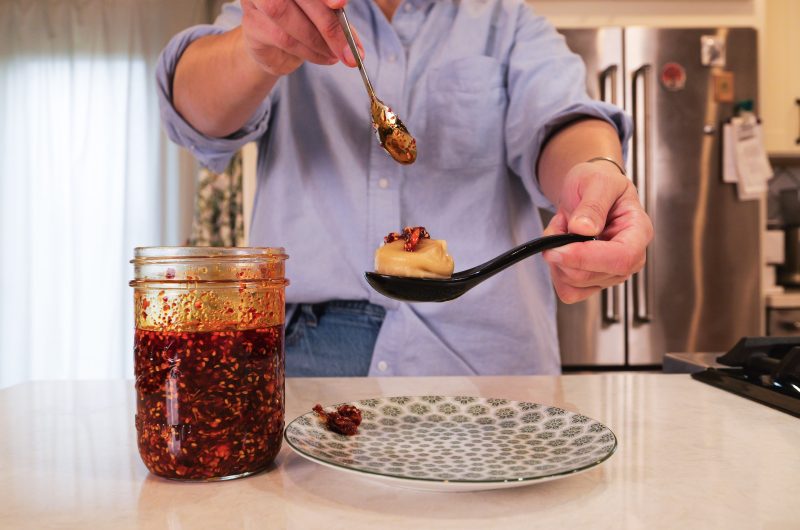
There’s something deeply satisfying about making your own Chili Oil at home. This condiment is incredibly versatile—spoon it over noodles, eggs, rice, dumplings, or even vanilla ice cream for a sweet-heat contrast. While it takes a bit of attention during the cooking process, the actual hands-on time is minimal, and the result is far superior to store-bought versions. You control the heat level, the crunch factor, and the aromatics. Once you make this homemade Chili Oil, you’ll find yourself reaching for it at every meal.
Ingredients – Chili Oil
Chili Base
- 1/4 cup gochugaru
- 1/4 cup red pepper flakes
- 1 tablespoon aleppo pepper
- 1/2 teaspoon kosher salt
- 2 teaspoons granulated sugar
- 1 tablespoon MSG
- 2 teaspoons dark soy sauce
- 1 teaspoon rice vinegar
- 3 tablespoons toasted white sesame seeds
- 4 tablespoons roasted peanuts, chopped (measure before chopping)
Chili Oil Infusion
- 1 cup peanut oil or other neutral oil (use up to 1-1/2 cups if you prefer more oil)
- 2 to 3 medium shallots (about 75g), finely sliced in rings or half rings
- 10 garlic cloves, finely sliced
- 1 inch (2.5cm) fresh ginger, finely sliced
- 1 cinnamon stick
- 2 star anise
- 1 teaspoon Sichuan peppercorns
Method – Chili Oil
Mix the Chili Base
Add the gochugaru, red pepper flakes, aleppo pepper, kosher salt, granulated sugar, MSG, dark soy sauce, rice vinegar, sesame seeds and chopped peanuts to a large heatproof bowl. Stir everything together and set the bowl somewhere safe—once the hot oil is poured over, it may splatter, so placing the bowl inside your kitchen sink is a smart move.
Infuse the Oil
Add the oil, shallots, garlic, ginger, cinnamon stick, star anise and Sichuan peppercorns to a saucepan. Set it over medium-low heat and let everything bubble away gently for 13 to 15 minutes, giving it a stir now and then. The goal is golden blonde aromatics, not brown, and definitely not burnt. Keep a very close eye on the color throughout this process.
Strain
Pour the hot oil through a sieve directly onto the chilli base—be careful, as it will sizzle and bubble vigorously. Tip everything left in the sieve onto a plate lined with kitchen paper and spread it out to cool and crisp up, about 10 minutes. Once completely cooled, fish out the cinnamon stick, star anise, and most of the peppercorns (a few stragglers are fine). You can also remove the ginger if you’re not keen on the texture.
Combine
Stir the crispy garlic, shallots, and any ginger you’re keeping back into the chilli mixture. Let it cool completely before transferring to a clean jar.
Recipe Notes
Store your Chili Oil in the fridge for up to 1 month. Slice your aromatics thin and evenly—the magic in chilli crisp is in the texture of the garlic, shallots, and ginger, so use a sharp knife and take your time. A mandoline with a guard makes this foolproof.
Temperature control is everything: your stovetop’s medium-low varies, so use the lowest heat setting you can to gently crisp the ingredients. If you see smoke or hear intense crackling, dial it back immediately.
Start with cold oil and add all aromatics and spices together, warming them gradually for even flavor release and that perfect golden crunch. Use a heavy-bottomed pan for even heat distribution. Let the crispy bits cool fully on paper towels spread in a thin layer to maintain crunch.
Test the oil temperature before pouring by adding a tiny pinch of chilli flakes—they should crackle gently, not explode violently. Remember that residual heat continues cooking after removing heat, so err on the side of removing the pan slightly early. Consider storing in small batches for optimal freshness.
Easy 20-Minute Chili Oil | Simple Pantry Staple Recipe
There’s something deeply satisfying about making your own chilli crisp at home. This condiment is incredibly versatile—spoon it over noodles, eggs, rice, dumplings, or even vanilla ice cream for a sweet-heat contrast. While it takes a bit of attention during the cooking process, the actual hands-on time is minimal, and the result is far superior to store-bought versions. You control the heat level, the crunch factor, and the aromatics. Once you make this, you’ll find yourself reaching for it at every meal.
Ingredients
- Chili Base
1/4 cup gochugaru
1/4 cup red pepper flakes
1 tablespoon aleppo pepper
1/2 teaspoon kosher salt
2 teaspoons granulated sugar
1 tablespoon MSG
2 teaspoons dark soy sauce
1 teaspoon rice vinegar
3 tablespoons toasted white sesame seeds
4 tablespoons roasted peanuts, chopped (measure before chopping)
- Oil Infusion
1 cup peanut oil or other neutral oil (use up to 1-1/2 cups if you prefer more oil)
2 to 3 medium shallots (about 75g), finely sliced in rings or half rings
10 garlic cloves, finely sliced
1 inch (2.5cm) fresh ginger, finely sliced
1 cinnamon stick
2 star anise
1 teaspoon Sichuan peppercorns
Directions
- Mix the Chili Base
- Add the gochugaru, red pepper flakes, aleppo pepper, kosher salt, granulated sugar, MSG, dark soy sauce, rice vinegar, sesame seeds and chopped peanuts to a large heatproof bowl. Stir everything together and set the bowl somewhere safe—once the hot oil is poured over, it may splatter, so placing the bowl inside your kitchen sink is a smart move.
- Infuse the Oil
- Add the oil, shallots, garlic, ginger, cinnamon stick, star anise and Sichuan peppercorns to a saucepan. Set it over medium-low heat and let everything bubble away gently for 13 to 15 minutes, giving it a stir now and then. The goal is golden blonde aromatics, not brown, and definitely not burnt. Keep a very close eye on the color throughout this process.
- Strain
- Pour the hot oil through a sieve directly onto the chilli base—be careful, as it will sizzle and bubble vigorously. Tip everything left in the sieve onto a plate lined with kitchen paper and spread it out to cool and crisp up, about 10 minutes. Once completely cooled, fish out the cinnamon stick, star anise, and most of the peppercorns (a few stragglers are fine). You can also remove the ginger if you’re not keen on the texture.
- Combine
- Stir the crispy garlic, shallots, and any ginger you’re keeping back into the chilli mixture. Let it cool completely before transferring to a clean jar.
Recipe Video
Notes
- Store in the fridge for up to 1 month. Slice your aromatics thin and evenly—the magic in chilli crisp is in the texture of the garlic, shallots, and ginger, so use a sharp knife and take your time. A mandoline with a guard makes this foolproof. Temperature control is everything: your stovetop’s medium-low varies, so use the lowest heat setting you can to gently crisp the ingredients. If you see smoke or hear intense crackling, dial it back immediately. Start with cold oil and add all aromatics and spices together, warming them gradually for even flavor release and that perfect golden crunch. Use a heavy-bottomed pan for even heat distribution. Let the crispy bits cool fully on paper towels spread in a thin layer to maintain crunch. Test the oil temperature before pouring by adding a tiny pinch of chilli flakes—they should crackle gently, not explode violently. Remember that residual heat continues cooking after removing heat, so err on the side of removing the pan slightly early. Consider storing in small batches for optimal freshness.
Looking For More Recipes?
Check out Salt & Honey’s Youtube channel for more recipe, meal prep, and even a behind-the-scenes look of S&H!
Warm up this winter with our cozy Hot Chocolate on our recipe blog!
Meal Prep Guides
Not only do we empower your recipe bank with gems like the Hot Cocoa and Beef Bourguignon but we have also developed a monthly meal prep guide. We utilize seasonal ingredients and the entire guide is centered around dishes with similar components.
Through the use of batch cooking, we want to make cooking easy, delicious and affordable. You can create the entire meal prep guide to plan your whole week or simply pick and choose which dishes resonate with you!
Make sure to check out our Youtube to find which we meal prep guide dishes we’re cooking for the week!
Our latest meal prep guide is February’s chocolate centered collection!
Additional Resources
Pinterest Board: Check out our mood board designed to provide even more inspiration for hors d’oeuvres. Here you can find more photos and videos covering our wide range of catering and event planning expertise. Whether you’re searching for food inspiration, food recipes, homemade decor, wedding planning ideas, and more, our mood boards will have your creativity soaring!
Instagram: Our feed provides a plethora of photo inspiration as well as DIY’s and tutorials on projects you can embark on at home. Whether it’s food recipes or even home decor, we will have what you’re searching for!Posted onAuthor
Substack: Monthly notes on slow living and seasonal flavors from Salt & Honey Catering and Events. Discover the recipes, garden tasks, and hosting tips that define our own event production. Here we will provide exclusive recipes, tips, and tricks only available on our free Substack!
Youtube Vlog: Ever wonder what the Catering and Event Production side of world looks like? Our “Beyond The Banquet” vlog series provides a peak through the curtain! We drop monthly short videos of the chaos and serenity behind the business. Come check it out now!