
It’s the start of May which means a brand new meal prep guide! This month we have 6 decadent meal prep recipes to brighten your May and provide you a jumpstart during every meal!
Meal Prep Guide PDF Download
You can download the full meal prep guide here in a condensed PDF.
Lemon Balm, Mint & Honey Tea
Serves 2
There is something deeply restorative about a cup of tea made with fresh herbs — and this one is as beautiful to look at as it is to drink. Lemon balm, with its soft citrus fragrance and gentle calming quality, pairs effortlessly with cool, bright mint and a spoonful of good honey that melts into the cup and rounds everything out into something genuinely special.
It takes five minutes to make, requires almost nothing of you, and feels like a little act of self-care in a mug. Make it in the afternoon when you need a quiet moment, or after dinner as a way to wind down. Once you’ve tried it with fresh herbs, the dried stuff will feel like a very poor substitute. You can start or end your meal prep with this delicious tea.

Ingredients
- Small handful fresh lemon balm leaves (about 10 to 12 leaves)
- Small handful fresh mint leaves (about 8 to 10 leaves)
- 2 cups just-boiled water
- 1 to 2 teaspoons raw honey, or to taste
- 2 thin slices of lemon, to garnish
Method
Gently bruise the lemon balm and mint leaves between your palms before adding them to a teapot or heatproof jug — this releases the essential oils and makes a noticeably more fragrant, flavourful cup. Pour over the just-boiled water and leave to steep for 4 to 5 minutes. The longer it steeps, the more pronounced the flavour will be.
Strain into two cups and stir in the honey while the tea is still hot, allowing it to dissolve completely. Float a thin slice of lemon on top of each cup and serve immediately. This is best served with any of the dishes within this month’s meal prep guide!
Recipe Notes
- Use water that has just come off the boil rather than a rolling boil — this preserves the delicate volatile oils in the fresh herbs and gives a cleaner, more nuanced flavour.
- Raw honey is worth seeking out here. Its floral complexity and depth bring far more to the cup than standard processed honey. A wildflower or acacia variety works beautifully.
- This tea is lovely served slightly chilled in warmer months — steep as usual, allow to cool to room temperature, then pour over ice and add a few extra mint leaves.
- Lemon balm is wonderfully easy to grow in a pot on a windowsill or in the garden and produces abundantly through spring and summer. If you can’t find it fresh, a good herbalist or farmers market is usually the best source.
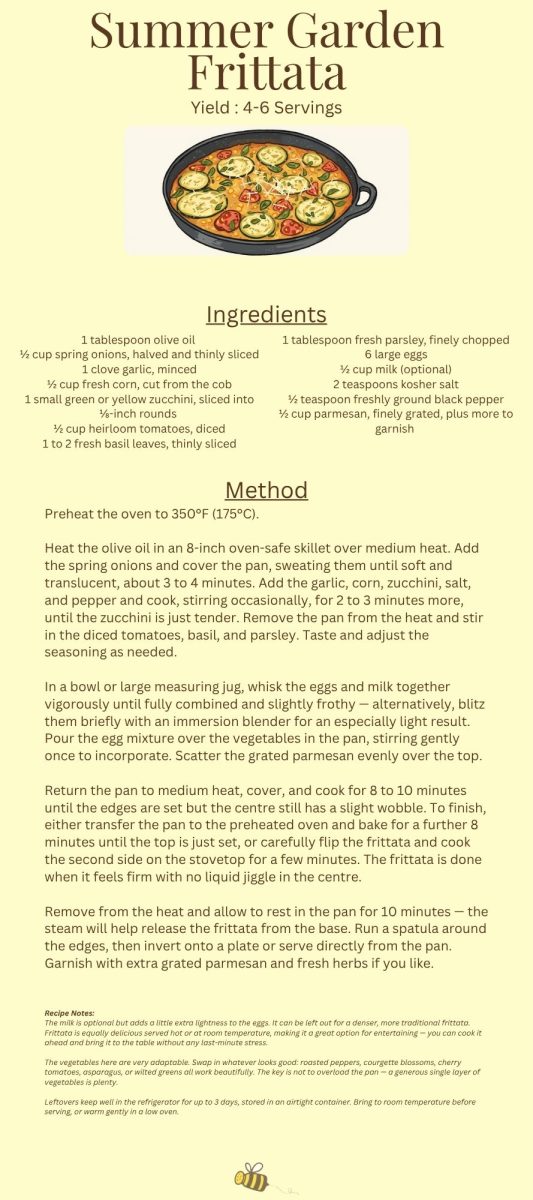
Summer Garden Frittata
Serves 4 to 6
A frittata is one of the most useful things you can know how to make. It comes together quickly, uses whatever vegetables you have on hand, and is just as good served warm from the pan as it is at room temperature an hour later — which makes it ideal for lazy summer brunches, picnics, or a light weeknight dinner. This version leans into the best of the season: sweet corn cut fresh from the cob, tender rounds of zucchini, juicy heirloom tomatoes, and a handful of herbs. It’s the kind of recipe that rewards a trip to the farmers market and barely any effort beyond that — this is summer in a meal prep.
Ingredients
- 1 tablespoon olive oil
- ½ cup spring onions, halved and thinly sliced
- 1 clove garlic, minced
- ½ cup fresh corn, cut from the cob
- 1 small green or yellow zucchini, sliced into ⅛-inch rounds
- ½ cup heirloom tomatoes, diced
- 1 to 2 fresh basil leaves, thinly sliced
- 1 tablespoon fresh parsley, finely chopped
- 6 large eggs
- ½ cup milk (optional)
- 2 teaspoons kosher salt
- ½ teaspoon freshly ground black pepper
- ½ cup parmesan, finely grated, plus more to garnish
Method
Preheat the oven to 350°F (175°C).
Heat the olive oil in an 8-inch oven-safe skillet over medium heat. Add the spring onions and cover the pan, sweating them until soft and translucent, about 3 to 4 minutes. Add the garlic, corn, zucchini, salt, and pepper and cook, stirring occasionally, for 2 to 3 minutes more, until the zucchini is just tender. Remove the pan from the heat and stir in the diced tomatoes, basil, and parsley. Taste and adjust the seasoning as needed.
In a bowl or large measuring jug, whisk the eggs and milk together vigorously until fully combined and slightly frothy — alternatively, blitz them briefly with an immersion blender for an especially light result. Pour the egg mixture over the vegetables in the pan, stirring gently once to incorporate. Scatter the grated parmesan evenly over the top.
Return the pan to medium heat, cover, and cook for 8 to 10 minutes until the edges are set but the centre still has a slight wobble. To finish, either transfer the pan to the preheated oven and bake for a further 8 minutes until the top is just set, or carefully flip the frittata and cook the second side on the stovetop for a few minutes. The frittata is done when it feels firm with no liquid jiggle in the centre.
Remove from the heat and allow to rest in the pan for 10 minutes — the steam will help release the frittata from the base. Run a spatula around the edges, then invert onto a plate or serve directly from the pan. Garnish with extra grated parmesan and fresh herbs if you like. This is the ideal breakfast meal prep dish.
Recipe Notes
- The milk is optional but adds a little extra lightness to the eggs. It can be left out for a denser, more traditional frittata.
- Frittata is equally delicious served hot or at room temperature, making it a great option for entertaining — you can cook it ahead and bring it to the table without any last-minute stress.
- The vegetables here are very adaptable. Swap in whatever looks good: roasted peppers, courgette blossoms, cherry tomatoes, asparagus, or wilted greens all work beautifully. The key is not to overload the pan — a generous single layer of vegetables is plenty.
- Leftovers keep well in the refrigerator for up to 3 days, stored in an airtight container. Bring to room temperature before serving, or warm gently in a low oven.
Pea, Feta & Herb Strata
Serves 6 to 8
A strata is essentially a savoury bread pudding — and if you’ve never made one before, prepare to wonder why it took you this long. This version is bright and fresh with spring flavours: sweet peas, salty crumbled feta, and a generous handful of thyme and parsley folded through a rich, custardy egg mixture that soaks into the bread overnight.
The result is something that feels special but asks almost nothing of you on the day — you do the work the evening before, and all that’s left in the morning is to slide it into the oven. It’s a brilliant dish for a leisurely brunch or a relaxed weekend lunch, and it feeds a crowd without any last-minute stress. It’s a perfect meal prep guide staple!

Ingredients
- 6 cups leftover bread, cut into cubes
- 3 cups half and half
- 10 eggs
- 1½ teaspoons kosher salt
- Pinch of freshly cracked black pepper
- 1 tablespoon fresh thyme, finely chopped
- 1 tablespoon fresh flat-leaf parsley, finely chopped
- 2 cups frozen peas, thawed
- 2 cups feta, crumbled
Method
Grease a 9 x 13-inch baking dish with butter or non-stick spray and set aside.
In a large bowl, whisk together the eggs and half and half until well combined. Season with the salt and pepper, then stir in the thyme and parsley.
Add the bread cubes to the baking dish, then scatter over the peas and crumbled feta. Pour the egg mixture evenly over the top, pressing down gently with your hands or a spatula to make sure all the bread is submerged and soaking in the custard.
Cover tightly and refrigerate overnight, or for at least 1 hour if baking the same day.
When ready to bake, preheat the oven to 350°F (175°C). Remove the strata from the refrigerator and allow it to come to room temperature for 20 to 30 minutes while the oven heats. Bake for 40 to 50 minutes, until the centre is set and the top is puffed and golden.
Allow to rest for 10 minutes before slicing and serving or packing into your weekly meal prep.
Recipe Notes
- Day-old or slightly stale bread works best here — it has a drier crumb that soaks up the custard without turning mushy. A sturdy country loaf, sourdough, or ciabatta are all excellent choices. Avoid anything too soft or enriched, like brioche, which can make the strata overly dense.
- The strata can be assembled up to 24 hours in advance and kept covered in the refrigerator. The longer it soaks, the more evenly the custard distributes through the bread.
- Leftovers keep well in an airtight container in the refrigerator for up to 3 days. Reheat individual portions in a 325°F (160°C) oven for 10 to 15 minutes, or until warmed through.
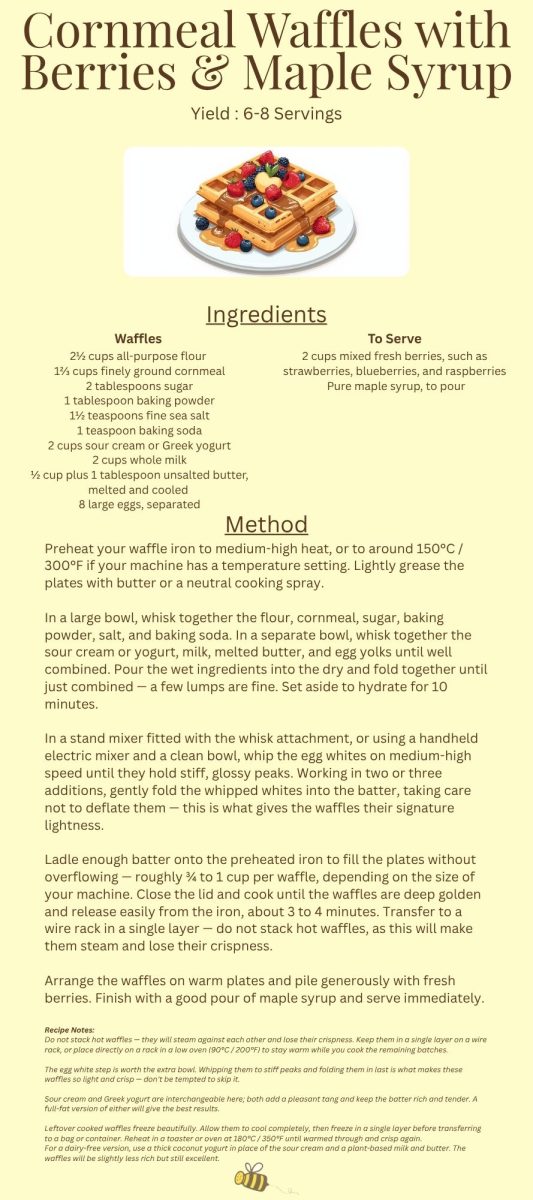
Cornmeal Waffles with Berries & Maple Syrup
Serves 6 to 8
These cornmeal waffles are the kind of weekend breakfast that makes getting out of bed feel worthwhile. The batter comes together quickly, and the secret to their extraordinary lightness is folding in whipped egg whites at the very end — it’s a small extra step that makes a genuinely big difference, giving each waffle a crisp, golden exterior and an almost impossibly airy interior. The cornmeal adds a subtle sweetness and just enough texture to set them apart from a standard waffle. Finished with fresh berries and a generous pour of maple syrup, they’re simple, beautiful, and endlessly satisfying. This is a must for any meal prep guide.
Ingredients – Waffles
- 2½ cups all-purpose flour
- 1⅔ cups finely ground cornmeal
- 2 tablespoons sugar
- 1 tablespoon baking powder
- 1½ teaspoons fine sea salt
- 1 teaspoon baking soda
- 2 cups sour cream or Greek yogurt
- 2 cups whole milk
- ½ cup plus 1 tablespoon unsalted butter, melted and cooled
- 8 large eggs, separated
Ingredients – To Serve
- 2 cups mixed fresh berries, such as strawberries, blueberries, and raspberries
- Pure maple syrup, to pour
Method
Preheat your waffle iron to medium-high heat, or to around 150°C / 300°F if your machine has a temperature setting. Lightly grease the plates with butter or a neutral cooking spray.
In a large bowl, whisk together the flour, cornmeal, sugar, baking powder, salt, and baking soda. In a separate bowl, whisk together the sour cream or yogurt, milk, melted butter, and egg yolks until well combined. Pour the wet ingredients into the dry and fold together until just combined — a few lumps are fine. Set aside to hydrate for 10 minutes.
In a stand mixer fitted with the whisk attachment, or using a handheld electric mixer and a clean bowl, whip the egg whites on medium-high speed until they hold stiff, glossy peaks. Working in two or three additions, gently fold the whipped whites into the batter, taking care not to deflate them — this is what gives the waffles their signature lightness.
Ladle enough batter onto the preheated iron to fill the plates without overflowing — roughly ¾ to 1 cup per waffle, depending on the size of your machine. Close the lid and cook until the waffles are deep golden and release easily from the iron, about 3 to 4 minutes. Transfer to a wire rack in a single layer — do not stack hot waffles, as this will make them steam and lose their crispness.
Arrange the waffles on warm plates and pile generously with fresh berries. Finish with a good pour of maple syrup and serve immediately. Although served best immediately, these waffles are still delicious if you need to meal prep your breakfast.
Recipe Notes
- Do not stack hot waffles — they will steam against each other and lose their crispness. Keep them in a single layer on a wire rack, or place directly on a rack in a low oven (90°C / 200°F) to stay warm while you cook the remaining batches.
- The egg white step is worth the extra bowl. Whipping them to stiff peaks and folding them in last is what makes these waffles so light and crisp — don’t be tempted to skip it.
- Sour cream and Greek yogurt are interchangeable here; both add a pleasant tang and keep the batter rich and tender. A full-fat version of either will give the best results.
- Leftover cooked waffles freeze beautifully. Allow them to cool completely, then freeze in a single layer before transferring to a bag or container. Reheat in a toaster or oven at 180°C / 350°F until warmed through and crisp again.
- For a dairy-free version, use a thick coconut yogurt in place of the sour cream and a plant-based milk and butter. The waffles will be slightly less rich but still excellent.
Eggs Benedict with Crispy Prosciutto
Serves 6 (2 Halves per Portion)
Eggs Benedict is one of those dishes that feels like a genuine occasion — the kind of brunch that earns a round of applause without requiring much more than good technique and a little patience. This version swaps the traditional Canadian bacon for prosciutto, roasted until crisp and salty at the edges, which adds a delicate crunch that pairs beautifully with silky poached eggs and a rich, lemony hollandaise. The English muffins are made from scratch — a simple, forgiving dough that can be prepared the night before — and the result is something far better than anything that comes from a packet. It’s a dish worth building the morning around.
The work within this recipe is well worth it. Our meal prep guide features multiple meals with varying difficulty levels and this one is one of the more skillful dishes.

Ingredients – English Muffins (Makes 12)
- 4¼ cups all-purpose flour
- 1½ teaspoons salt
- 1½ teaspoons sugar
- ¼ teaspoon instant yeast
- 1½ tablespoons neutral oil
- 1½ cups warm water
- Cornmeal, for dusting
Ingredients – Hollandaise Sauces
- 18 egg yolks
- 6 tablespoons fresh lemon juice
- 2 tablespoons Dijon mustard
- 3 cups unsalted butter, melted and hot
- 1 teaspoon cayenne pepper
- 1 teaspoon kosher salt
- ½ teaspoon freshly cracked black pepper
Ingredients – To Assemble
- 12 oz prosciutto, thinly sliced
- 12 large eggs
- 1 tablespoon white vinegar
- ½ cup fresh herbs, finely chopped (such as chives or flat-leaf parsley)
Method
In a large bowl, whisk together the flour, salt, sugar, and yeast. In the bowl of a stand mixer, combine the warm water and oil. With the mixer running on low, gradually add the dry ingredients and mix until a shaggy dough forms. Turn the dough out onto a lightly floured surface and knead until smooth and elastic. Transfer to a lightly oiled container, cover, and refrigerate for 24 hours.
The next day, remove the dough from the refrigerator and turn it out onto a lightly floured surface. Divide into 12 equal pieces (about 90g each) and roll each into a smooth, tight ball. Dust the tops and bottoms generously with cornmeal and arrange on a lightly greased baking sheet. Leave in a warm place to proof until roughly doubled in size.
Warm a griddle or large frying pan over medium heat and spray lightly with non-stick spray. Cook the muffins in batches, pressing each one gently when you flip it to flatten slightly. Cook until deep golden brown on both sides, about 5 minutes per side. Transfer to a baking sheet and bake in a 350°F (175°C) oven for 10 minutes to ensure the centres are fully cooked through. Allow to cool slightly before splitting.
Add the egg yolks, Dijon mustard, lemon juice, cayenne, salt, and pepper to a blender. Blend for a few seconds to combine. With the blender running on low, very slowly pour in the hot melted butter in a thin, steady stream. The sauce will thicken and become smooth as the butter emulsifies. Taste and adjust seasoning. Keep warm until ready to serve.
Preheat the oven to 400°F (200°C). Lay the prosciutto in a single layer on a baking sheet lined with parchment paper. Roast for 5 to 10 minutes, until the edges are golden and the slices are crisp. Keep a close eye — prosciutto can go from crisp to burnt quickly. Set aside.
Bring a large, wide pot of water to a gentle simmer. Add the white vinegar and a generous pinch of salt. Working in batches, crack each egg into a small cup or ramekin, create a gentle swirl in the water, and carefully slide the egg in. Poach for 3 to 4 minutes, until the whites are set but the yolks remain soft. Remove with a slotted spoon and drain briefly on a paper towel.
Split and toast the English muffins. Place a slice or two of crispy prosciutto on each muffin half, then top with a poached egg. Spoon the hollandaise generously over the top and finish with a scatter of finely chopped fresh herbs. Serve immediately.
Recipe Notes
- The English muffin dough needs to be made the day before — the long, cold ferment develops flavour and makes the dough easy to handle. Don’t skip the rest; it’s what gives the muffins their signature nooks and chew.
- Hollandaise is best made just before serving, as it can be tricky to reheat without splitting. If you need to hold it for a short time, keep it warm in a heatproof bowl set over a pot of warm (not simmering) water, stirring occasionally.
- For a more manageable brunch, the English muffins can be made a day ahead and stored in an airtight container at room temperature. Split and toast them to order.
- Poaching eggs can feel daunting for a crowd — a splash of white vinegar in the water helps the whites hold together neatly. For ease, poach the eggs a few minutes ahead, transfer to a bowl of warm water, and reheat briefly in simmering water just before serving.
- Store-bought English muffins work perfectly well here if you’d rather focus your energy on the hollandaise and eggs.
Blueberry Muffins with Strawberry Chia Jam
Makes 12 muffins and approximately 1 cup jam
These are the blueberry muffins you’ll want to make every weekend — tall, tender, and absolutely loaded with berries, finished with a buttery, cinnamon-spiced crumble that bakes into something gloriously crunchy on top. For breakfast or simply a mid-day snack, these are essential for any all-around meal prep.
They’re the kind of thing that fills the kitchen with the best possible smell and disappears from the counter before they’ve even fully cooled. Paired with a quick strawberry chia jam — just four ingredients, no sterilising, ready in under fifteen minutes — this is a combination that feels far more special than the effort involved. Make the jam first, let it chill while the muffins bake, and you’ll have both on the table at the same time. Simple enough for a lazy Sunday morning, impressive enough to bring to a brunch.

Ingredients – Crumble Topping
- 1⅓ cups all-purpose flour
- ½ cup light brown sugar, packed
- 1½ tablespoons granulated sugar
- ½ teaspoon ground cinnamon
- ¼ teaspoon ground nutmeg
- ½ cup plus 1 tablespoon cold unsalted butter, cubed
Ingredients – Muffins
- 2¼ cups all-purpose flour
- 1½ teaspoons baking powder
- ½ teaspoon baking soda
- ½ teaspoon kosher salt
- ¼ cup neutral oil
- ¾ cup plus 3 tablespoons granulated sugar
- 2 large eggs
- 1 tablespoon vanilla extract
- ½ cup sour cream
- 1½ cups fresh blueberries
Ingredients – Strawberry Chia Jam
- 1 cup strawberries, hulled and quartered
- 3 teaspoons agave syrup
- 1 tablespoon chia seeds
- ½ teaspoon fresh lemon juice
Method
Start with the jam. Place the strawberries and agave syrup in a small saucepan over medium heat. Cook, stirring occasionally, until the mixture begins to bubble and the berries have broken down into a rough, saucy consistency, about 5 to 7 minutes. Remove the pan from the heat and stir in the lemon juice and chia seeds until well combined. Transfer to a clean jar or airtight container and allow to cool to room temperature before sealing. Refrigerate for at least 2 hours before serving — the chia seeds will absorb the liquid as the jam chills, thickening it to a spreadable consistency.
For the crumble topping, combine the flour, brown sugar, granulated sugar, cinnamon, and nutmeg in a bowl. Add the cold cubed butter and use your fingertips to work it into the dry ingredients until small, irregular clumps form — you want some larger pieces for texture. Refrigerate until ready to use.
Preheat the oven to 350°F (175°C). Line a 12-cup muffin tin with paper liners and set aside.
In a medium bowl, whisk together the flour, baking powder, baking soda, and salt. Set aside. In the bowl of a stand mixer fitted with the paddle attachment, beat the sugar and oil together on medium speed until light and frothy, about 2 to 3 minutes. Add the eggs one at a time, mixing well after each addition. Add the sour cream and vanilla extract and mix until fully incorporated. Add the dry ingredients and mix on low speed until the batter is smooth and thick, taking care not to overmix. Remove the bowl from the mixer and fold in the blueberries gently with a spatula.
Divide the batter evenly between the lined muffin cups — each should be about two-thirds full. Sprinkle the crumble topping generously over each muffin.
Bake for 20 to 24 minutes, rotating the tin halfway through, until the tops are golden and a toothpick inserted into the centre comes out clean. Remove from the oven and turn the muffins out onto a wire rack immediately to cool. Serve with the strawberry chia jam alongside.
Recipe Notes
- A note on the crumble butter: cold butter is key to getting good clumps in the topping — if the butter is too warm, the mixture will come together as a paste rather than a crumble. If your kitchen is warm, pop the finished topping back into the freezer for 10 minutes before using.
- Sour cream can be swapped for full fat Greek yogurt with great results — it keeps the crumb just as tender and adds a similar tang.
- Fresh blueberries are ideal here, but frozen work well too — add them straight from frozen without thawing to prevent the batter from turning purple. Tossing them in a teaspoon of flour before folding in can also help keep them suspended in the batter.
- The jam will continue to thicken the longer it sits in the refrigerator. If it firms up more than you’d like, stir in a teaspoon of water to loosen before serving. For a smoother jam, use an immersion blender or the back of a fork to break down the fruit further before adding the chia seeds. This recipe also works well with other berries — raspberries, blackberries, or a mixture all make a wonderful swap.
- Muffins are best eaten the day they’re baked, when the crumble topping is at its crunchiest. They will keep in an airtight container at room temperature for up to 2 days — a few minutes in a warm oven will help revive the topping. The jam keeps in an airtight jar in the refrigerator for up to 1 week. The crumble topping can be made ahead and stored in the refrigerator for up to 3 days, or frozen for up to a month — sprinkle straight from frozen.
Looking For More Recipes?
Check out Salt & Honey’s Youtube channel for more recipe, meal prep, and even a behind-the-scenes look of S&H!
Meal Prep Guides
Not only do we empower your recipe bank with gems like the Hot Cocoa and Beef Bourguignon but we have also developed a monthly meal prep guide. We utilize seasonal ingredients and the entire guide is centered around dishes with similar components.
Through the use of batch cooking, we want to make cooking easy, delicious and affordable. You can create the entire meal prep guide to plan your whole week or simply pick and choose which dishes resonate with you!
Make sure to check out our Youtube to find which we meal prep guide dishes we’re cooking for the week!
Take a look at our May Meal Prep Guide alongside the entire year’s collection of meal prep.
Additional Resources
Pinterest Board: Check out our mood board designed to provide even more inspiration for hors d’oeuvres. Here you can find more photos and videos covering our wide range of catering and event planning expertise. Whether you’re searching for food inspiration, food recipes, homemade decor, wedding planning ideas, and more, our mood boards will have your creativity soaring!
Instagram: Our feed provides a plethora of photo inspiration as well as DIY’s and tutorials on projects you can embark on at home. Whether it’s food recipes or even home decor, we will have what you’re searching for!
Substack: Monthly notes on slow living and seasonal flavors from Salt & Honey Catering and Events. Discover the recipes, garden tasks, and hosting tips that define our own event production. Here we will provide exclusive recipes, tips, and tricks only available on our free Substack! There’s recipes here that are exclusive and won’t appear in our meal prep guides.
Youtube Vlog: Ever wonder what the Catering and Event Production side of world looks like? Our “Beyond The Banquet” vlog series provides a peak through the curtain! We drop monthly short videos of the chaos and serenity behind the business. Come check it out now!
2 thoughts on “Seasonal Meal Prep Guide: 6 Decadent May Recipes You Should Try”
Comments are closed.