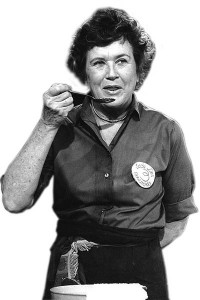
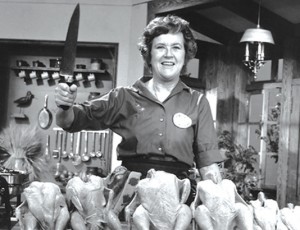
She almost made it to live a century long, but Julia Child passed away eight years ago, leaving the legacy of her food to stir French cooking to new heights and inspiring both chefs and those who can’t even boil water to brandish their “what-the-hell attitudes” and get cooking. Julia made cooking approachable even for those who cringe in the sight of an oven, claiming “the best way to execute French cooking is to get good and loaded and whack the hell out of a chicken. ” She forever changed the course of home cooking, inspiring chefs like our very own Olivia at Salt & Honey, who grew up watching Julia’s shows “The French Chef” and “Julia and Jacques,” the chance to harness her skills outside of traditional culinary instruction and motivate Olivia to do as Julia did by leaving her career to follow her dream of becoming a chef.
We’re celebrating what would have been Julia’s 100th birthday this week, as are 100 restaurants around the country. In fact, the culinary world is calling it Julia week, August 8th-15th (ending the bash on her birthday, August 15th), celebrating with special restaurant menus and events to honor the bon vivant and larger-than- life chef whose spirit, candor, and humor inspired so many of us to cook with love and not take ourselves too seriously.
To commemorate Julia, Salt & Honey is in the kitchen making a complete Julia meal with our favorite recipes from different chapters of her cooking career. These recipes aren’t afraid to showcase rich flavors, for as Julia said, “the only time to eat diet food is while you’re waiting for the steak to cook.”
Bon appétit! A Julia Child Birthday Meal
Appetizer: Scallops Gratinee
Salad course: Celery Root Remoulade
Main: Coq Au Vin over a bed of white rice
Side: Ratatouille
Dessert: Charlotte Chantilly
We recommend you gather a few of your friends to celebrate Julia’s centenary year with these recipes which pay tribute to the legacy of Julia’s food. Our last Julia Child adage, one of our favorites (besides of course “I think every woman should have a blowtorch”) bears us to dive right in to our food, make no apologies, and enjoy being in the kitchen, which we will pass along to you: “Learn how to cook- try new recipes, learn from your mistakes, be fearless, and above all have fun!”
Appetizer Course
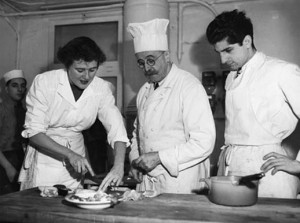
Julia began her culinary journey in France, developing a liking for French cuisine and attending Cordon Bleu cooking school after leaving her career at a government intelligence agency during World War II where she was assigned in message exchanges of top-secret documents between U.S. officials and intelligence officers. Shortly after graduating, Julia published a two-volume cookbook Mastering the Art of French Cooking, which she co-wrote with two Cordon Bleu fellow graduates.*
Julia’s Scallops Gratinee from the cookbook takes scallops, butter (“If you’re afraid of butter, use cream”), and swiss cheese and makes heaven on a plate. The dish is perfect for the cold summer days of San Francisco, while the scallops are in season and we can enjoy them with warmer dishes.
*Interesting fact: the original publisher of Mastering the Art of French Cooking rejected manuscript, saying it was too long. Julia stayed true to her dream and pushed another publisher to go forward with the 3lb. book.
 Scallops Gratineed with Wine, Garlic, and Herbs
Excerpted from Mastering the Art of French Cooking by Julia Child. Copyright © 1961 by Alfred A. Knopf.
1/3 cup minced yellow onions
1 Tb butter
1½ Tb minced shallot or green onions
1 Clove minced garlic
1½ lbs. washed scallops
Salt and pepper
1 cup sifted flour in a dish
2 Tb butter
1 Tb olive oil
A 10-inch enameled skillet
2/3 cup dry white wine, or ½ cup dry white vermouth and 3 Tb water
½ bay leaf
1/8 tsp thyme
6 buttered scallop shells, or porcelain or pyrex shells, of 1/3 cup capacity
1/4 cup grated Swiss cheese
2 Tb butter cut into 6 pieces
Cook the onions slowly in butter in a small saucepan for 5 minutes or so, until tender and translucent but not browned. Stir in the shallots or onions, and garlic, and cook slowly for 1 minute more. Set aside.
Dry the scallops and cut into slices 1/4 inch thick. Just before cooking, sprinkle with salt and pepper, roll in flour, and shake off excess flour.
Sautee the scallops quickly in very hot butter and oil for 2 minutes to brown them lightly.
Pour the wine, or the vermouth and water, into the skillet with the scallops. Add the herbs and the cooked onion mixture. Cover the skillet and simmer for 5 minutes. Then uncover, and if necessary boil down the sauce rapidly for a minute until it is lightly thickened. Correct seasoning, and discard bay leaf.
Spoon the scallops and sauce into the shells. Sprinkle with cheese and dot with butter. Set aside or refrigerate until ready to gratinee.
Just before serving, run under a moderately hot broiler for 3 to 4 minutes to heat through, and to brown the cheese lightly.
Salad Course
Also from Mastering the Art of French Cooking is our salad course, Celery Root Remoulade, also perfect for the (slightly warmer) summer months.
 Celery Root Remoulade
Excerpted from Mastering the Art of French Cooking by Julia Child. Copyright © 1961 by Alfred A. Knopf.
1 1/4 pod of untrimmed celery root
1/2 lemon for rubbing & juice
1/2 tsp salt
1 tbsp djion mustard
3 tbsp sour cream
2 tbsp Julia’s mayonnaise
1/2 tsp fresh ground pepper
With a sharp knife, slice off the knobby end of the celery root and most of the thick brown peel. Trim the bits of brown remaining in the surface cracks (but don’t worry, you don’t need to get it all). Slice the peeled root in half (if you find a spongy area in the centre, just cut it out). Rub the pieces with lemon to prevent discolouring.
Shred into small thin ribbons using a mandolin or a knife. After ribboning the celery root, toss with salt and 1 tsp of lemon juice. Let the shreds marinate and soften for about 30 minutes or up to an hour before dressing.
Stir together the mustard, sour cream, mayonnaise and pepper in a small bowl. Fold the dressing into the celery root and toss to mix well, then taste, add more salt, pepper or lemon juice as needed. Cover with plastic wrap and refrigerate for an hour or two.
When ready to serve, taste again and adjust the seasonings. If you wish, arrange on large leaves of lettuce and garnish with parsley or a tomato rose.
Main Course
After sweeping television cooking shows and taking the home cooking world by storm, Julia also authored many notable cookbooks up until her (very) later years. This next recipe comes from one of her later cookbooks, The Way to Cook, which she published in 1989. Our main course is Julia’s infamous Coq Au Vin, her signature French dish perfect for serving a gathering of six to eight friends. We served this dish over a bed of white rice as Julia recommends, perfect for souping up the vin. Make sure you have a couple glasses of wine and hack away at the chicken parts, as Julia would do if she were in your kitchen.
 Coq au Vin
Excerpted from The Way to Cook by Julia Child. Copyright © 1989 by Julia Child.
1/2 cup (4 ounces) lardons – 1 by 1/4 inch strips of blanched slab bacon or salt pork (see Special Notes)
2 1/2 to 3 pounds frying chicken parts
1/3 cup good brandy, optional
2 Tbs butter
1 Tbs olive oil or good cooking oil
Salt and freshly ground pepper
1 or 2 large cloves of garlic, puree
1 imported bay leaf
1/4 tsp or so thyme
1 large ripe red unpeeled tomato, chopped, or 1/3 cup canned Italian plum tomatoes
3 cups young red wine (Zinfandel, Macon, or Chianti type)
1 or more cups chicken stock
Beurre manie for the sauce (1 1/2 Tbs each flour and softened butter blended to a paste)
Fresh parsley springs, or chopped parsley
12 to 16 small brown-braised white onions
3 cups fresh mushrooms, trimmed, quartered and sautéed
For Chicken: Before browning the chicken, sauté the blanched bacon or salt pork and remove to a side dish, leaving the fat in the pan.
Dry the chicken parts thoroughly then brown the chicken in the pork fat, adding a little olive oil, if needed.
Flame the chicken with the brandy, if you wish. It does gives its own special flavor, besides being fun to do.
For brown-braised onions and mushrooms: In the same pan, sauté the peeled onions in the remaining fat on moderate heat until fairly tender, add the mushrooms, raise heat, cooking until mushrooms begin to tenderize; add butter or olive oil if necessary.
In the same pan, add the chicken, garlic, bay, thyme and tomato. Pour in the wine and enough stock barely to cover the ingredients. Bring to the simmer; cover, and simmer slowly for 20 minutes or until the chicken is tender when pressed.
Remove the chicken to a side dish, and spoon surface fat off the cooking juices. Pour the juices into a saucepan and taste very carefully for strength and seasoning. Boil down rapidly if it needs strength, adding more of the seasonings if you think them necessary.
Off heat, whisk the beurre manie to make a lightly thickened sauce. Bring briefly to the simmer. The sauce should be just thick enough to coat a spoon lightly.
Wash out the casserole; return the chicken to it. Spoon the sauce over the chicken, simmering a few minutes, basting, to rewarm the chicken and to blend flavors.
Special Notes
To blanch bacon or salt pork:
When you use bacon or salt pork in cooking, you want to remove its salt as well as its smoky flavour, which would permeate the rest of the food. To do so, you blanch it, meaning you drop it into a saucepan of cold water to cover it by 2 to 3 inches, bring it to the boil, and simmer 5 to 8 minutes; then drain, refresh in cold water, and pat dry in paper towels.
Side Dish
Our recommended side dish, Ratatouille, is a signature French dish and the perfect accompaniment to the Coq Au Vin. This is from Mastering the Art of French Cooking, and as the book title expresses, it may take a few times of cooking this recipe to master the dish. But, like all of Julia’s recipes, it’s the best ratatouille you’ll ever eat and is well worth the effort.
 Ratatouille
Excerpted from Mastering the Art of French Cooking by Julia Child. Copyright © 1961 by Alfred A. Knopf.
½ lb. zucchini (I used a combination of zucchini and pattypan squash from my garden)
1 tsp. salt
4 Tb. olive oil, more if needed
½ lb. (about 1 ½ cups) thinly sliced yellow onions
2 (about 1 cup) sliced green bell peppers (I used 1)
2-3 Tb. olive oil, if necessary
2 cloves mashed garlic
1 lb. firm, ripe, red tomatoes, peeled, seeded and juiced to make 1 ½ cups pulp (I used a combination of red and yellow tomatoes from my garden)
3 Tb. minced parsley
Salt and pepper to taste
Peel the eggplant and cut into slices 3/8 inch thick, about 3 inches long, and 1 inch wide. Scrub the zucchini, slice off the two ends, and cut like the eggplant. Place in a bowl and toss with the salt. Let stand for 30 minutes.
Drain your eggplant and zucchini slices and dry them on a towel.
One layer at a time, sautée the eggplant, and then the zucchini in hot olive oil for about a minute on each side to brown very lightly. Remove from the pan and set aside.
In the same skillet, cook the onions and the peppers slowly in olive oil for about 10 minutes, or until tender but now browned. Stir in the garlic and season to taste.
Boil a small pot of water and immerse your tomatoes for about 10 seconds. Remove, cool, and peel off the skins.
Slice the peeled tomatoes through the center, and gently squeeze them over a bowl to extract the juices and seeds. Slice the juiced and seeded tomatoes (Julia calls this the “tomato pulp”) into 3/8 inch strips.
Lay the sliced tomato pulp over the onions and peppers. Season with salt and pepper. Cover the skillet and cook over low heat for 5 minutes, or until the tomatoes have begun to render their juice. Uncover, baste with the juices, raise heat and boil for several minutes, until juice has almost evaporated.
Place a third of the tomato mixture in the bottom of a heavy casserole pot (the recipe calls for a 2 1/2 quart fireproof casserole about 2 1/2 inches deep) and sprinkle over it 1 Tb. of parsley. Arrange half of the eggplant and zucchini on top, then half the remaining tomatoes and parsley. Put in the rest of the eggplant and zucchini, and finish with the remaining tomatoes and parsley.
Cover the casserole and simmer over low heat for 10 minutes. Uncover, tip casserole and baste with the rendered juices Correct seasoning, if necessary. Raise heat slightly and cook uncovered for about 15 minutes more, basting several times, until juices have evaporated leaving a spoonful or two of flavored olive oil. Be careful of your heat; do not let the vegetables scorch in the bottom of the casserole.
Set aside, uncovered, and reheat slowly at serving time, or serve cold.
Dessert Course
And finally (yes finally!) we come to the dessert course, one of our favorite Julia recipes that will be sure to wow your guests and have them licking their spoons clean. This is another recipe that is well worth the effort. Charlotte Chantilly also comes from Mastering the Art. It’s a molded dessert which combines a cold strawberry or raspberry cream (we like to use both since they are in season) with ladyfingers. And of course you make the ladyfingers yourself- don’t you dare cheat and buy them at the store because you will pay the price in deliciousness!
 Charlotte Chantilly, Aux Fraises/Framboises
The Batter
An electric beater or a wire whip
½ Cup granulated sugar
3 Egg yolks
1 Tsp Vanilla extract
A 3-quart mixing bowl
3 Eggs whites
Pinch of salt
1 Tb granulated sugar
A rubber spatula
½ Cup all-purpose flour (scooped and leveled), turned into a flour sifter
Gradually beat the sugar into the egg yolks, add the vanilla, and continue beating for several minutes until the mixture is thick, pale yellow, and forms ribbons.
Beat the egg whites and salt together in a separate bowl until soft peaks are formed. Sprinkle on the sugar and beat until stiff peaks are formed.
Scoop one fourth of the egg whites over the top of the egg yolks and sugar mixture. Sift in one fourth of the flour, and delicately fold in until partially blended. Then add one third of the remaining egg whites, sift on one third of the remaining flour, fold until partially blended, and repeat with half of each, then the last of each. Do not attempt to blend the mixture too thoroughly or you will deflate the batter; it must remain light and puffy.
A round of waxed paper
A 2-quart cylindrical mold about 4 inches high and 7 inches in diameter, lined with ladyfingers
1½ Pints fresh strawberries or raspberries
A wire whip or electric beater
A 3-quart stainless steel mixing bowl
2/3 Cup instant sugar (very finely granulated)
8 Egg yolks
A Pan of not-quite-simmering water
A bowl with a tray of ice cubes and water to cover them
2½ Cups chilled heavy whipping cream
A 4-quart metal bowl
A chilled beater
Extra ladyfingers, if needed
A round of waxed paper
A chilled serving dish
1-3 cups fresh strawberries or raspberries
Place the round of waxed paper in the bottom of the unbuttered mold. Then line the sides of the mold (not the bottom) with upright ladyfingers (see recipe below).
Hull, wash, and drain the berries. Force them through a sieve and into a bowl. Measure out 1¼ cups of puree. Chill.
Beat the sugar into the egg yolks and continue beating until mixture is pale yellow and falls back on itself forming a slowly dissolving ribbon. Then place the mixing bowl over the not-quite-simmering water and beat until mixture has thickened into a cream and becomes uncomfortably hot for your finger. Set bowl in ice water and beat until mixture is cold and falls back upon itself forming a slowly dissolving ribbon on the surface; fold with a spatula until chilled.
When the egg yolk mixture has chilled, beat the cream until it has doubled in volume and forms stiff (rather than soft) peaks.
Fold the chilled strawberry or raspberry puree into the chilled egg yolk mixture, then fold in the whipped cream. Turn into the mold. Place ladyfingers over the cream to fill the mold almost completely. Trim off any protruding ladyfingers around the edges of the mold. Cover with waxed paper and refrigerate for at least 6 hours or overnight.
Just before serving, remove waxed paper, run a knife around the edge of the mold, and reverse dessert onto a chilled serving dish. Remove waxed paper. Decorate the top of the dessert with fresh berries and, if you wish, place more berries around the dessert.
Ladyfingers
Excerpted from Mastering the Art of French Cooking by Julia Child. Copyright © 1961 by Alfred A. Knopf. For 24 to 30 ladyfingers
2 12×14 inch baking sheets
1 Tb Softened butter
Flour
A pastry bag with a round tube opening 1/2 inch in diameter
1½ Cups powdered sugar in a sieve or a shaker
Preheat oven to 300 degrees. Prepare the baking sheets: butter lightly, dust with flour, and knock off excess flour. Assemble the pastry bag. Prepare the powdered sugar. Measure out all the rest of the ingredients listed in the recipe.
Forming the ladyfingers: Scoop batter into pastry bag. Squeeze out even lines onto the prepared baking sheets, making finger shapes 4 inches long and 1½ inches wide, spaced 1 inch apart. Sprinkle with a 1/16-inch layer of powdered sugar. To dislodge some of the excess sugar, hold baking sheet upside down and tap the back of it gently; the ladyfingers will not budge unless you are rough with them.
Baking the ladyfingers: Bake in the middle and upper third levels of preheated oven for about 20 minutes. The ladyfingers are done when they are a very pale brown underneath their sugar coating. They should be slightly crusty outside, and tender but dry inside. If they are not baked enough, they will become soggy when they cool; overbaking makes them dry. As soon as they are done, remove from baking sheets with a spatula and cool on cake racks.

